Showing posts with label crafts. Show all posts
10.28.2013
{Halloween 2013} creepy cards
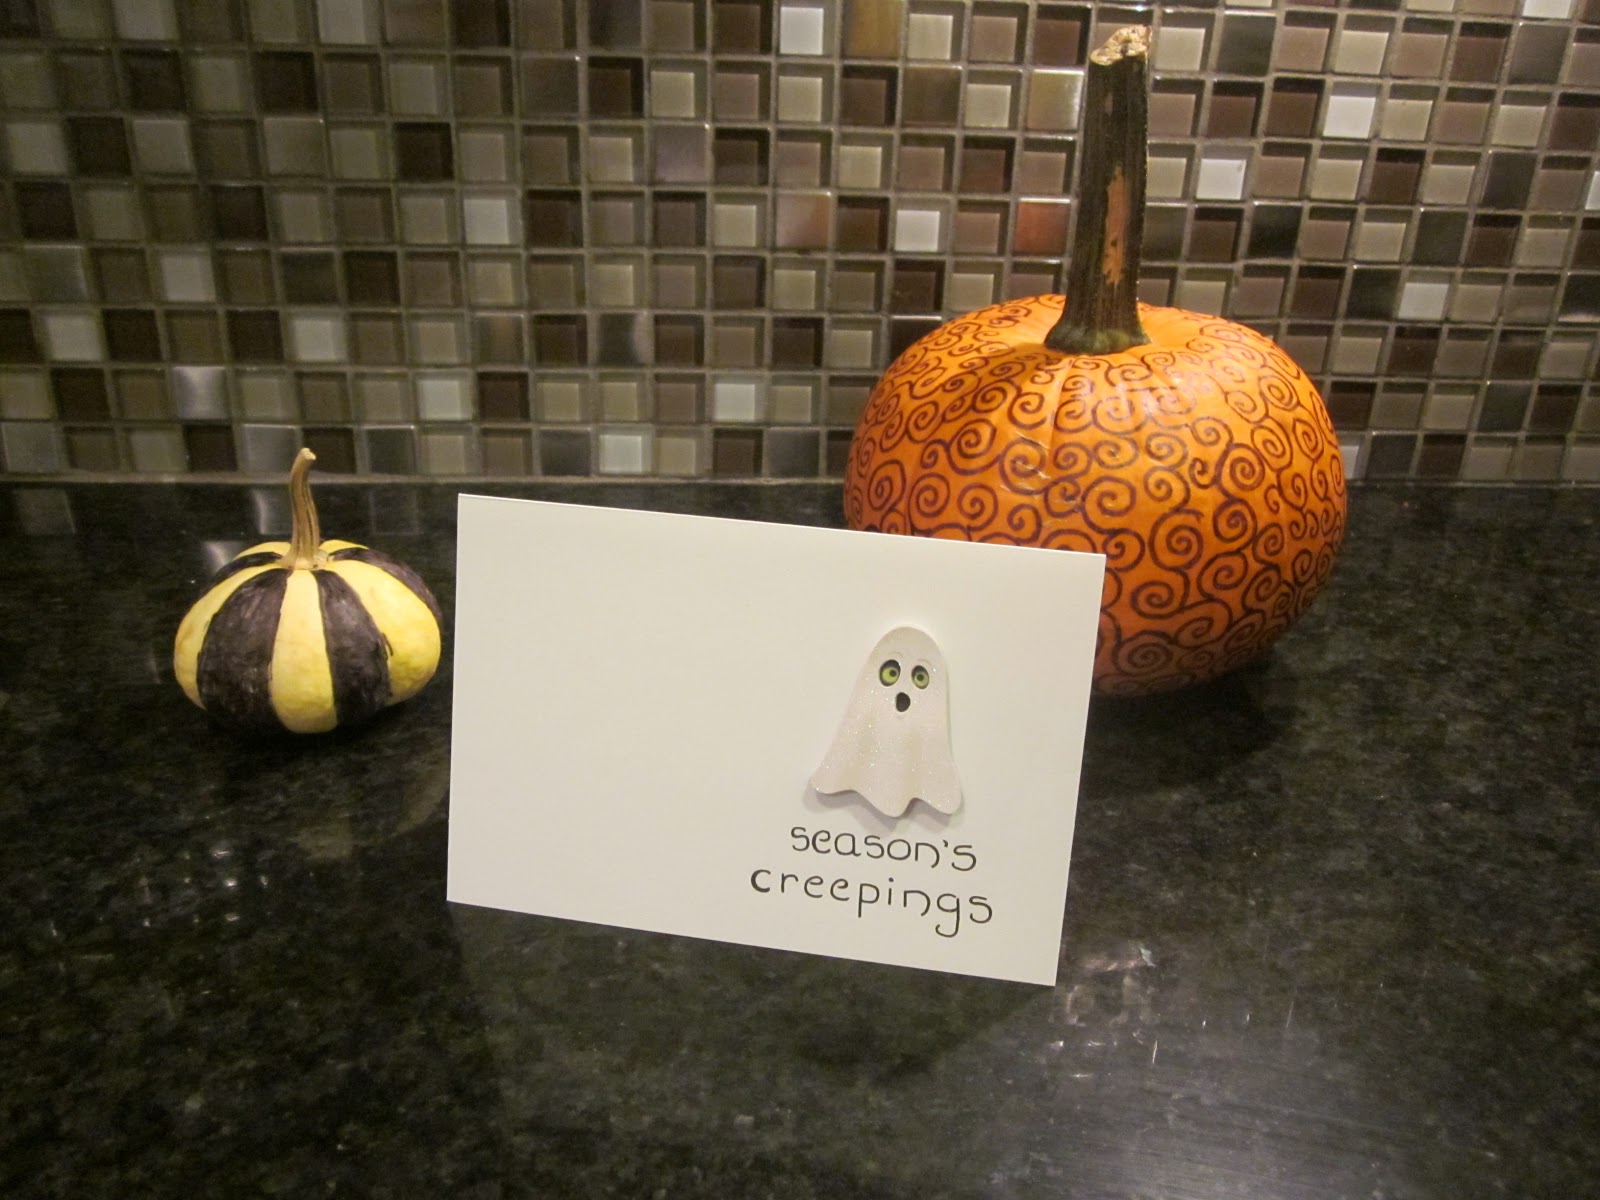
I love, love designing & creating cards & Halloween is no exception. It's such fun to spread Season's Creepings to family & friends! This year, I was inspired by whimsical Halloween-patterned papers I found. Would you like to take a peek at my Halloween cards?
Skulls, witches, ghosts & bats! Do you have a favorite?
Photography: Koru Kate for Koru Wedding
4.01.2013
{Easter} bunny tails crafting
Easter has come & gone! I happen to adore the celebration of hope & new beginnings. So much so that we celebrated all weekend long! We started on Friday with an informal celebration with my sister & brother-in-law & ended on Sunday with an official celebration with my husband's family. We are so very lucky & blessed to share our lives with such incredible, loving people.
Like most holidays, I made Easter cards for our friends & family. I picked a pastel palette, then created a Happy Easter banner above a bunny with a contrasting tail. I called it a bunny tail card, my friend dubbed it a bunny butt card. Whatever works!
My lovely friend Jen of Jen Kim Made snapped the sweet photo above of my Easter card I sent to her. Since I didn't have time to style & capture my Easter cards, I really appreciate the photo. Big thanks to her!
I hope your weekend was full of close family & good friends & happy celebrations!
3.18.2013
{St. Patrick's Day} chevron-style crafting
St. Patrick's Day has come & gone! I enjoyed our annual St. Patrick's Day festivities of corned beef & cabbage dinner made & hosted by my sister & brother-in-law. So yummy & such fun!
Just like we have corned beef & cabbage every year, I always make St. Patrick's Day cards for my family. Traditions, traditions! This year, I picked a simple, stylish chevron shamrock design on kraft paper card stock. It was so simple to make using my Silhouette Portrait machine! I picked paper in two shades of green & the Silhouette cut each into solid shamrocks & chevron shamrocks. With a base of a solid shamrock in one shade of green layered with a chevron shamrock in another shade of green, I quickly & easily crafted this cute design for my St. Patrick's Day cards.
As always, a big thanks to the greenest, cutest bear, Miss Siobhan, for her excellent St. Patrick's Day card modeling skills!
2.11.2013
{Valentine's Day} Pinspired Valentines
Since the holiday crafting party was so much fun, we decided to have another crafting day: A Pinspired Party. You know how you pin & pin images that inspire you but you never get around to tackling the project, whether it be a craft, recipe or cleaning tip? At the Pinspired Party, each guest chose a craft from their crafty Pinterest board & we actually made them!
With Valentine's Day quickly approaching, I picked a pretty Valentine's Day card that had been languishing on my Crafty Projects Wish List board for over a year:
I got busy with my paper punch & my deep purple, hot pink & heart red paper to create the ruffle effect:
Before I knew it, I had gorgeous, homemade Valentines to send to our family & friends:
Once I got home, I had more Valentines to make & my poor hand had cramped from punching the paper. It's a bit of a workout! Lucky for me, my amazing husband bought me a Silhouette, a fancy paper cutting machine, for Christmas & I put it to good use making these extra Valentines:
The Pinspired Party was a good time! It was cool to finally complete a craft from my Crafty Project Wish List board & I was so inspired by the other talented ladies & their beautiful crafts. For a complete recap of the crafts & food of our Pinspired Party, please visit Crafty Party Girls on Jen Kim Made!
I can't wait for our family & friends to receive the made with love, pinspired Valentines!
Photo 1: via; Photo 2-4: koru kate
2.07.2013
{Valentine's Day} DIY Heart Photo Montage
I'm a firm believer of showing your love every day but showing a little extra love on special days like anniversaries, birthdays & holidays like Valentine's Day is just fine. & eek- Valentine's Day is one week away! If you're anything like me, you may be scrambling to find a sweet, thoughtful gift. May I present to you the quick, easy, inexpensive, meaningful DIY Heart Photo Montage:
All you need are memories, photos, double-stick tape & wall space! Here are the easy instructions:
1. Choose your photos. My heart consists of 48 photos which created a large photo heart. Adjust the number of photos according to how big or small you'd like your heart & order a few extra just in case. Pick either a variety of photos from many events from the past year, from many special times over the years or from a big, recent event like your wedding or birth of your first child.
2. Print your photos. The quickest route is to upload your photos to sites like Snapfish & pick them up one hour later at Walgreen's.
3. Find a nice spot on the wall & make your photo heart. Start with the longest row & apply each photo with double-stick tape (my longest row was eight photos). Build upon your longest row, tapering down to a point below it & creating two arches above it.
Viola- you have sweet heart for your Valentine!
My DIY Heart Photo Montage was inspired by Martha Stewart & I made it for my husband last year. I assembled it while he was at work & surprised him with it when we got home from our Valentine's Day dinner. He was extremely touched! Whether you make it for your significant other, kids or parents, the DIY Heart Photo Montage will melt their hearts!
p.s. I can't wait to show you what little crafty Valentine's Day present I am making my husband this year!! Details coming soon.
12.19.2012
{Holidays 2012} maybe next year
I committed to two DIY holiday projects this year: Christmas cards & Glitter candles. There's only so much one girl can handle. My holiday-loving heart hasn't stopped pinning DIY holiday projects though. I'm thinking maybe next year!
The Christmas ornament shadow box is my latest find & as the easiest, most affordable option, it's the most likely to get done next year. I'd go with white & silver Christmas ornaments to match my love for winter white snowflakes:
It pretty much drives me crazy that the photo isn't centered but I truly adore the golden wreath made of thumbtacks. Yes, thumbtacks! Made in gold or silver with the recipient's favorite color bow, the thumbtack wreath would make a lovely gift:
Mason jars may get a bad rap, yet there is no denying the simple beauty of the holiday mason jar. Again, very inexpensive & very easy. Just a jar filled with greenery, cranberries & floating candle. Maybe I can squeeze this project in this year:
Last but certainly not least is my very favorite holiday DIY project: the rustic crate centerpiece. The centerpiece shown below features a vintage Pepsi crate filled with Mason jars, pinecones, greenery & holly sprigs. I would be torn between copying it as exactly as possible or playing with the container & filler to make it my own. I just LOVE this natural beauty:
By the time next Christmas season comes, I'm sure my DIY Holiday Project wish list will have grown!
Tune in tomorrow to see our humble home decorated for the holidays!
Photo 1: via; Photo 2: via; Photo 3: via; Photo 4: via
12.13.2012
{Holidays 2012} Spreading Holiday Cheer
I've done it again: I lost my holiday mind & decided to make our Christmas cards this year. Even though I clearly vowed to never do so again after the insanity of last year. Oh, & I signed up for a handmade holiday card swap. Oh, make that two handmade holiday card swaps! Yes, I knowingly committed myself to crafting 60+ Christmas cards. Plus I'd already made 10 cards for Holiday Mail for Heroes. As I mentioned, I lost my holiday mind!
Except that I do truly love designing & making cards :-)
For the Brooklyn Bride 6th Annual Holiday Card Swap handmade card swap & the Brenda's Wedding Blog Handmade Holiday Card Swap, I created my Natural Holiday card with kraft paper card, snowflake border stamped in white & holiday message handwritten in silver:
On the inside of every holiday card design, I kept things simple with a handwritten message in silver & the finishing touch of a snowflake stamp in white:
For our family & friends' cards, I created two designs. The first is my Let it Snow card with red card stock, silver snowflake border stamped in silver & holiday message handwritten in silver:
The next design is my Merry & Bright card- so different for me & really jazzy & fun! I used red card stock, fine silver glitter & silver metallic pen:
Every holiday card was tucked into a coordinating envelope & sealed with cute snowman stickers:
Designing & making our Christmas cards was quite the project! One night, the entire house was covered in silver glitter from top to bottom, including our pup. There were definitely moments when I was tempted to give up & buy cards but all in all, it's great fun to step away from the computer & tv to be creative. I love crafting & spreading holiday cheer to fellow crafties, family & friends!
11.29.2012
{Holidays 2012} Crafting for Our Heroes
To kick off the festive holiday season, I was really honored to spend the day crafting for a good cause with Jen, Emily & Louisa. Jen kindly hosted us at her place where we gathered with mimosas, treats, & craft supplies galore to make holiday cards for Holiday Mail for Heroes, a great Red Cross program that distributes cards to veterans, military families & active duty service members around the world. Crafting is always fun but crafting for a worthy cause is just plain wonderful.
Not only did these ladies bring their amazing talent, they brought enough awesome craft supplies to make a well-stocked craft store blush. You name the holiday-themed supply & we had it: stamps, punches, stickers, ribbons, embossers, etc, etc:
I have a real soft spot for snowflakes so all my cards featured snowflakes:
When the fun day of crafting came to a close, we made over 40+ beautiful cards for Holiday Mail for Heroes! Here is a small sampling of the handmade holiday cheer that will be spread to our heroes:
A big thanks to Jen & the always adorable Humphrey & the too pretty Mila for hosting us in their beautifully holiday-decorated home. As you can see, Humphrey & Mila are as cute as can be:
Last year, I sent one card to Holiday Mail for Heroes & I was so excited to send 40+ cards this year. Big thanks to Jen, Emily & Louisa for making it happen! If you would like to show your support & send holiday cheer to our military, it's so easy. By Friday, December 7, simply send a signed card to:
Holiday Mail For Heroes
P.O. Box 5456
Capital Heights, MD 20791-5456
For more information & complete instructions (no glitter!), please visit Holiday Mail for Heroes.
Here's to hoping everyone's holiday season is merry & bright!
10.29.2012
{Mrs. Monday} Lazy Girl's Halloween
* Due to a little miss Hurricane Sandy headed our way, I am writing all posts in advance this week. My thoughts & prayers are with everyone in her path. May you be safe & well!
No Fall is complete without our annual trip to Wightman's Farm. This year, the trip came on a cool, cloudy Sunday in early October. The leaves were just starting to change, the crispness was just beginning to tinge the air &, as always, there were plenty of plump pumpkins, fresh apple cider and homemade donuts. & boy, did we indulge in the Fall treats!
A gallon of apple cider for me, a gallon of apple cider for RZ. Six donuts for me, six donuts for RZ. One pumpkin for me, one pumpkin for RZ. Hey, fair is fair! The delicious donuts & yummy apple cider only lasted about one week but our pumpkins sat & patiently waited for the day when I would decorate them for Halloween.
With Halloween fast approaching, that day came last week- time to decorate our pumpkins & send our Halloween cards. I was feeling a bit lazy, to put it mildly.
I went with a minimalist look for our Halloween cards to spread some "season's creepings" to our family & friends across the miles:
Then I turned my attention to my pumpkins- two orange pumpkins from the farm & two white pumpkins recently acquired after my white pumpkin obsession. Once again, it was just me, pumpkins & a black Sharpie. While one little white pumpkin got away with going naked, I went with fun swirls, polka dots & stripes for the others:
Less you think the polka dot pumpkin is suffering from a disease, that is actually one metallic silver polka dot. All in all, not too bad for a lazy girl's Halloween!
Seasons creeping to you!
4.06.2012
Easter Spots
Last weekend when my husband mentioned Easter was the following Sunday, I thought it was an April Fool's joke. I'm serious. Where is time going?! Once I checked the calendar & established that he was not kidding, I was left with one night to craft homemade Easter cards for our family.
Yikes! No time to shop. Quickly, I grabbed blank cards, colored pens, patterned papers & scallop paper punch out of my craft armoire & came up with a little something like this:
A sweet, simple design with just a touch of sparkle:
I designed each card around the favorite color of the recipient, like this green palette for my Mom:
The cards may have been a rush job but I like the pretty spots of color & patterns:
Happy Easter, Happy Passover, Happy Celebrations to you & yours!
Photos by Koru Kate
Labels:
cardmaking,
cards,
crafts,
DIY,
easter,
family,
holiday,
holiday crafts,
holiday DIY,
homemade
3.16.2012
green crafts & wishes
St. Patrick's Day is special to me, it means more than sipping a Guinness & wearing green. As a kid & through adulthood, my Mom always prepared us a traditional Irish dinner of corned beef & cabbage. Now that my Mom has fled lovely Jersey for sunny California, my sister keeps up the tradition & hosts our corned beef & cabbage dinner. It's always a fun night!
I can't cook to save my life but I'm handy with paper, scissors & glue so I started a little tradition of my own: making & sending St. Patrick's Day cards to our family & friends. I enjoy creating a design, making the cards & sending them with love. This year, I went a modern route by making different, random designs with four, pretty green ribbons & sprinkling in a green shamrock or two. Each card was unique which was pretty fun. I put a little dash of Irish love into each & every card!
The lovely Miss Siobhan kindly agreed to model my 2012 St. Patrick's Day cards. Of course, there she is up above proudly displaying one design. Here she is with a few more versions:
Because I'm a sucker for finishing touches, each card was sealed with a cute green shamrock:
I wish I could send a card to each of my wonderful readers! Since I can't, I've chosen this St. Patrick's Day wish for you:
Happy St. Patrick's Day!
Photo 1-3 Koru Kate Photo 4 Seed Factory
Labels:
cardmaking,
cards,
crafts,
DIY,
family,
green,
handmade,
holiday,
personal,
st. patrick's day,
st. patty's day,
tradition
3.15.2012
green goodness
In honor of St. Patrick's Day, this week I celebrated green in weddings- green bridal bouquets & green bridesmaid dresses. I adore green & I didn't use it in our wedding so this little green exercise has been the most fun for me. & it's been leading up to this very moment: glorious green centerpieces!
A creative centerpiece that is practically an ode to everything that is good & green with its air plant, cactus & succulent:
An exotic, green centerpiece is living large:
A leafy, original centerpiece that makes quite the green statement:
A Bells of Ireland centerpiece that proves this common centerpiece filler does just fine on its own green stems:
Speaking of St. Patrick's Day & green goodness, here is another sneak peek at my homemade cards to be revealed tomorrow:
I have to say, after seeing these green delights, I almost wish I had used green for our wedding. Is/Was there a color you regretted not using for your wedding?
Photo 1 Aubrey Joy Photography via Photo 2 Mademoiselle Fiona Photography via Photo 3 Source Unknown via Photo 4 Aquario Studio via Photo 5 Koru Kate
Labels:
bride,
brides,
cardmaking,
cards,
centerpiece,
color,
crafts,
decor,
decorating,
decoration,
DIY,
flowers,
green,
green wedding flowers,
holiday,
reception,
st. patrick's day,
st. patty's day,
wedding,
weddings
12.14.2011
Holiday Card Evolution
In what seemed like a flash of brilliance, I chose to send homemade Christmas cards this year. I enjoy making cards & I adore the holiday season so why not? Sure, crafting 50+ Christmas cards would be my largest cardmaking project yet. Oh yes, of course I would find the time for this project during the busy holiday season.
Looking back, I identify that moment as a stroke of insanity!
Allow me to take you on the journey of the Koru Kate Holiday 2011 Card from inspiration (I'm so excited to make my holiday cards!) to reality (What in the world was I thinking?) . . .
Six weeks ago, I pinned a snowflake card as my inspiration:
A few minor tweaks of colored card stock & patterned paper later, I was happy with sweet Version 2 of my holiday card:
I'm pretty proud of my humble holiday cards. We dropped the first batch in the mail last night; the second batch should be ready this evening. I've glued my fingers together, I've smudged countless snowflakes, I've wondered if the project would ever end. But there is a definite satisfaction knowing I created our newlywed holiday cards with care & love for our family & friends.
Will I make my holiday cards next year? Ha, by then I will have forgotten the insanity & I will think it's a fabulous idea!
Photo 1 via, Photo 2-6 by Koru Kate
Looking back, I identify that moment as a stroke of insanity!
Allow me to take you on the journey of the Koru Kate Holiday 2011 Card from inspiration (I'm so excited to make my holiday cards!) to reality (What in the world was I thinking?) . . .
Six weeks ago, I pinned a snowflake card as my inspiration:
One trip to Paper Source, one trip to AC Moore & one raid of my craft armoire later, I had Version 1 of my holiday card:
A few minor tweaks of colored card stock & patterned paper later, I was happy with sweet Version 2 of my holiday card:
Bright Version 3 of my holiday card on RZ's choice of classic holiday red card stock:
A few more of lovely Version 2 on my choice of icy blue card stock:
I'm a complete sucker for details so every card has a snowflake stamped on its butt:
I'm pretty proud of my humble holiday cards. We dropped the first batch in the mail last night; the second batch should be ready this evening. I've glued my fingers together, I've smudged countless snowflakes, I've wondered if the project would ever end. But there is a definite satisfaction knowing I created our newlywed holiday cards with care & love for our family & friends.
Will I make my holiday cards next year? Ha, by then I will have forgotten the insanity & I will think it's a fabulous idea!
Photo 1 via, Photo 2-6 by Koru Kate
Labels:
ac moore,
cardmaking,
cards,
christmas,
crafts,
DIY,
family,
friends,
holiday,
inspiration,
newlywed,
paper source,
pinterest,
snowflakes
Subscribe to:
Posts (Atom)


